Higashiyama walking route
Kyoto: Kyoto historic Higashiyama walking tour
How long does the Higashiyama walking route take?
The core route from Kiyomizu-dera through Ninenzaka and Sannenzaka to Yasaka Shrine and Gion covers about 2.5km and takes 2-3 hours at a comfortable pace with stops, longer if you add Kodai-ji or Maruyama Park. Starting at Kiyomizu-dera before 9am avoids the worst of the mid-morning tour-group crowds on the connecting slopes.
Higashiyama is the one part of Kyoto genuinely built for walking rather than transit between sights — a continuous stretch of stone-paved slopes, historic lanes, and a working geisha district running roughly 2.5km from Kiyomizu-dera down to Gion. Most guidebooks describe the individual stops; this one lays out the actual route, in order, with realistic timing and the specific points where crowds become the deciding factor in how much you enjoy it.
| Where | Kiyomizu-dera to Gion, eastern Kyoto |
| Distance | ~2.5km, stepped and cobbled throughout |
| Time needed | 2-3 hours core route; half-day with detours |
| Getting there | Bus from Kyoto Station (~15-20 min) or 20-min walk from Gion-Shijo Station |
| Best time | Before 9am, or reversed starting late afternoon in Gion |
| Terrain | Stepped and cobbled throughout; no flat alternative |
Why walk Higashiyama rather than take a tour bus between sights
Higashiyama is one of the few districts in Kansai genuinely better experienced on foot than by any form of transit, and it’s worth explaining why before diving into the route itself. The district’s appeal is cumulative and textural — the specific feel of stone paving underfoot on Sannenzaka, the way sound changes as you move from the open approach to Kiyomizu-dera into the narrower, quieter lanes near Kodai-ji, the gradual transition from temple architecture into Gion’s residential machiya streets — none of which comes through from a bus window or a series of disconnected taxi stops.
Tour buses generally can’t access the narrower streets at all, dropping visitors at a single point (usually near Kiyomizu-dera) and requiring a walk regardless; treating the whole district as a single continuous walking route, rather than a series of separate stops, is simply the more efficient and more rewarding way to see it.
Starting point: Kiyomizu-dera
Begin at Kiyomizu-dera, reachable by bus from Kyoto Station (about 15-20 minutes) or a 20-minute uphill walk from Gion-Shijo Station on the Keihan Line. The temple’s wooden main hall, built in 1633 without a single nail and extending off the hillside on 139 pillars, is worth entering (¥500 entry) before starting the downhill walk — arriving before 9am means both a calmer temple visit and a head start on the connecting slopes before tour groups arrive. Budget 45-60 minutes here including the approach path and Otowa Waterfall, where visitors queue to drink from one of three streams said to grant health, longevity, or academic success.
Leg one: Kiyomizu-zaka to Sannenzaka (10-15 minutes)
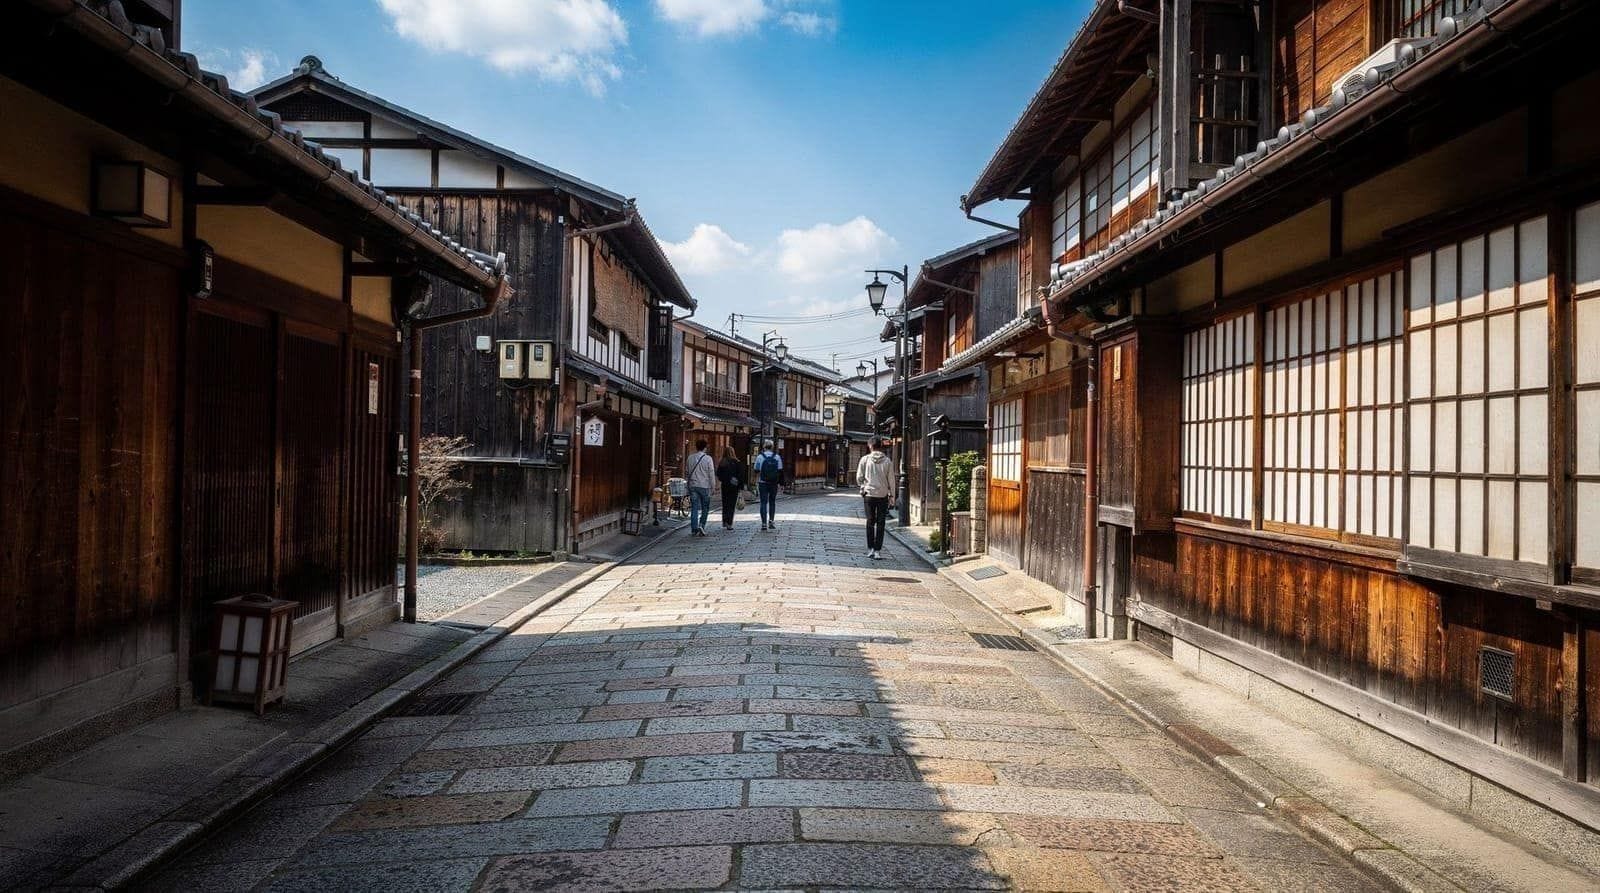
Exit through the temple’s main approach, Kiyomizu-zaka, a stepped and cobbled street lined with pottery shops, sweets stores, and small restaurants — touristy but genuinely part of the neighborhood’s centuries-old commercial character rather than a purely modern construction. This connects directly into Sannenzaka, one of two famous sloped lanes (the name roughly means “three-year slope,” tied to an old superstition that stumbling here brings three years of bad luck) that feature in more Kyoto postcards than almost anywhere else in the city.
Leg two: Sannenzaka to Ninenzaka (10 minutes)
Sannenzaka connects to Ninenzaka (“two-year slope”), a similarly preserved, wood-and-tile-roofed stretch, and together the two slopes form the most photographed corridor in Higashiyama. This is also the district’s worst bottleneck — from roughly 10am to 4pm, especially on weekends and during cherry blossom or autumn foliage season, foot traffic here slows to a genuine shuffle. Starting the route early, as recommended above, is the single biggest lever for actually experiencing these streets rather than fighting through them.
Detour option: Kodai-ji and Ishibe-koji (adds 20-30 minutes)
A short detour east from the main route leads to Kodai-ji, a Zen temple with a rock garden and a bamboo grove considerably less crowded than Arashiyama’s better-known one — worth the detour if you’ve already done Arashiyama and want a quieter second version. Ishibe-koji, a genuinely quiet cobblestone lane near Kodai-ji, sees a fraction of the foot traffic of Ninenzaka and Sannenzaka and is worth the two-minute detour for a break from the crowds.
Historic Higashiyama walking tour covers this stretch, including Kodai-ji, with a guide explaining the neighborhood’s Edo-period commercial history — useful context that’s easy to miss walking through independently without background on why these specific streets survived intact.
Leg three: down to Yasaka Shrine and Maruyama Park (15 minutes)
Continuing downhill, the route reaches Yasaka Shrine, Gion’s guardian shrine, founded over a thousand years ago, free to enter, and open around the clock, with a vermilion main gate that’s one of the district’s most photographed spots outside the two slopes themselves. Directly behind it, Maruyama Park — Kyoto’s oldest public park — centers on a large weeping cherry tree that’s illuminated at night during bloom season; outside cherry blossom season, it’s a quiet, shaded spot to rest before continuing into Gion proper.
Kiyomizu-dera, Higashiyama, and Yasaka Shrine tour covers this full first half of the route — temple to shrine — in a single guided outing if you’d rather not navigate the slopes and detour options independently.
Leg four: into Gion (10-15 minutes)
From Yasaka Shrine, Hanamikoji Street leads into Gion proper, the preserved geisha district where geiko and maiko still walk between appointments in the early evening. This is a working district, not a themed attraction — ochaya (teahouses) operate by introduction only, and some private alleys near Hanamikoji now carry no-photography restrictions with fines, a direct response to tourist behavior toward geiko and maiko in recent years. Treating any unmarked door as private and keeping a respectful distance from anyone in kimono en route to an appointment covers the practical etiquette here.
Gion geisha district walking tour extends the route through Gion itself with a guide who can explain the geiko/maiko apprenticeship system and point out the visual cues distinguishing rank — genuinely difficult to pick up without guidance, and a natural continuation of the temple-to-shrine walk covered above.
Total distance and realistic timing
The full route — Kiyomizu-dera to Gion via Sannenzaka, Ninenzaka, and Yasaka Shrine — covers roughly 2.5km of walking, almost entirely on stepped or sloped stone paving with no flat alternative route, worth knowing if mobility or stroller access is a concern. At a comfortable pace with photo stops but without extended detours, budget 2-2.5 hours; adding Kodai-ji, Ishibe-koji, and time to browse shops along the slopes extends this to a full half-day.
When to walk it: timing makes or breaks this route
Early morning (temple opening to around 9:30am) is the single best window for the slopes themselves — calm streets, opening shops, and soft morning light. The alternative approach is walking it in reverse, starting in Gion in the late afternoon and finishing at Kiyomizu-dera before its evening closing (typically around 6pm, earlier in winter), which combines a calmer version of Gion with the chance of seeing geiko or maiko heading to evening appointments. Weekends, cherry blossom season (late March-early April), and Gion Matsuri (all of July, with main processions on July 17 and 24) push crowds into genuinely uncomfortable territory at any hour — if your schedule allows a weekday, take it.
Water, shade, and summer heat management
Kansai’s summer (June-August, 28-35°C with high humidity) makes this route considerably more demanding than in cooler seasons, given the exposed stone paving and limited shade along Kiyomizu-zaka and the upper slopes. Vending machines are frequent along the main path, though less common in quieter detours like Ishibe-koji, so carrying water rather than relying entirely on machines along the route is a reasonable precaution. Several shops along Ninenzaka and Sannenzaka sell shaved ice and cold drinks specifically aimed at overheated walkers during summer, a genuinely useful stop rather than just a tourist indulgence if the heat is becoming a real factor partway through the route.
Coin lockers and practical logistics
Coin lockers are available near the Higashiyama bus stop and at Kiyomizu-dera’s base, useful if you’re carrying luggage before checking into accommodation elsewhere in Kyoto. There’s no meaningful flat, accessible alternative to the stepped route described here — the entire corridor from Kiyomizu-dera down to Gion is built on a hillside, and wheelchair or stroller users should plan around bus connections at specific points rather than attempting the full walking route.
Combining this route with a guided small-group option
For visitors who want a broader introduction to Kyoto’s historic districts beyond just Higashiyama, Kyoto best-of small group walking tour covers Higashiyama alongside other central Kyoto highlights in a single guided day, a reasonable option if this is your only full day in the city and you want more ground covered than the Higashiyama-only route above.
Where to eat along the way
Pontocho, a narrow dining alley parallel to the Kamo River just west of Gion, is the natural dinner stop at the end of this route — a mix of affordable yakitori and more serious kaiseki dining, with riverside seating platforms (yuka) open in summer. See our Gion and Higashiyama destination guide for more on the district’s food options, and our Kyoto kaiseki guide if a formal multi-course dinner is the plan for the evening.
Extending the day: Fushimi Inari or central Kyoto
If you finish this route by early afternoon, Fushimi Inari is a straightforward continuation south on the Keihan Line from Gion-Shijo Station, while central Kyoto’s Nijo Castle and Nishiki Market require a short walk or bus connection instead. Getting back to Osaka afterward is a roughly 50-minute ride on the Keihan Main Line from Gion-Shijo to Yodoyabashi or Kyobashi, no transfer needed.
Traveling this route with children
The Higashiyama route’s stepped, uneven terrain is genuinely more demanding for young children than the flat routes covered elsewhere on this site, such as the Osaka Castle walking route, and a stroller is impractical for anything beyond the initial approach to Kiyomizu-dera. That said, most school-age children handle the route’s distance and stairs without particular difficulty, and the visual interest of the slopes, shops, and temple architecture tends to hold kids’ attention better than a flatter, more repetitive walk might.
Building in extra time for shop browsing (several stores along Ninenzaka and Sannenzaka sell traditional sweets and small toys that double as an easy incentive for younger walkers) and planning a rest stop at Maruyama Park partway through helps manage a family pace better than trying to complete the full route at an adult walking speed.
Photography tips specific to this route
Sannenzaka and Ninenzaka are at their most photogenic in the soft, low-angle light of early morning or the hour before sunset, when the crowds are thinner and the light rakes across the wood-and-tile rooftops at a more flattering angle than the flat, harsh light of midday. Kiyomizu-dera’s main hall is best photographed from the viewing platform partway along the approach path looking back at the stage structure, rather than only from directly beneath it.
As covered elsewhere in this guide, some private alleys near Hanamikoji in Gion carry photography restrictions specifically to protect geiko and maiko — checking posted signage before photographing in that specific stretch is essential, distinct from the more general photography-friendly nature of the rest of the route.
What to wear for this walk
Given the stepped, cobbled terrain throughout the route, comfortable closed-toe walking shoes matter more here than at most Kyoto sights — sandals and dress shoes are genuinely uncomfortable on Sannenzaka and Ninenzaka’s uneven stone paving, and slip-on shoes with reasonable grip are the practical compromise if you’ll also be removing them frequently for temple interiors along the way. Layered clothing is worth planning for regardless of season, since the route moves between exposed hillside sections (Kiyomizu-dera’s approach) and shaded, narrower streets (Ninenzaka, Ishibe-koji) with noticeably different sun and temperature exposure.
Rainy day considerations
The Higashiyama route is entirely walkable in light rain, though the stone paving on Sannenzaka and Ninenzaka becomes genuinely slippery when wet, worth slowing your pace for rather than rushing between stops. Kiyomizu-dera’s main hall and interior spaces offer some shelter if rain intensifies mid-route, and several shops along the slopes have covered awnings extending over the street that provide brief respite without requiring a full stop. Heavy rain is one of the few conditions that meaningfully thins the crowds on this route even during peak season, which some visitors consider a reasonable trade-off for a still-doable walk with noticeably more breathing room.
Combining this route with a Gion cultural experience
Given that the route naturally ends in Gion, timing the walk so it finishes in the late afternoon opens up the option of booking a scheduled cultural experience — a tea ceremony, a maiko performance, or a kimono rental session — as a natural continuation rather than a separate outing requiring backtracking. Our Gion district guide covers these bookable experiences in more depth, including which ones suit a first-time visitor best given the district’s introduction-only ochaya system.
Toilets and rest stops along the route
Public restrooms are available at Kiyomizu-dera’s approach, near the Higashiyama bus stop, and at a handful of points along the main tourist path, though they thin out noticeably once you’re deeper into the residential side streets like Ishibe-koji. Planning restroom stops around the more established points — Kiyomizu-dera’s entrance, the base of the slopes, Yasaka Shrine’s grounds — rather than assuming facilities will appear conveniently throughout is worth doing given how spread out the route is.
How this route compares to walking Arashiyama
Visitors who’ve already walked Arashiyama’s bamboo grove and temple district sometimes wonder how it compares to Higashiyama for a second Kyoto walking day. Arashiyama’s appeal is more singular and photograph-driven (the bamboo grove itself), with the surrounding temples and river spread more widely and requiring more transit between stops; Higashiyama’s appeal is more continuous and textural, a single connected walk without the same degree of backtracking. Neither is objectively better, but if time allows only one, Higashiyama’s continuous route arguably gives a more complete sense of a single Kyoto neighborhood’s character in one sitting.
A slower, two-visit alternative
For visitors with more than one day available in Kyoto, splitting this route across two separate visits — Kiyomizu-dera and the slopes on one day, Gion and the evening geiko/maiko-watching on another — allows a genuinely unhurried pace at each without the pressure of covering the full route in a single push. This also allows timing each half for its ideal window independently: Kiyomizu-dera and the slopes for an early morning visit, Gion for a separate evening outing later in the trip, rather than compressing both into one long day that inevitably means visiting at least one half at a less-than-ideal time.
Frequently asked questions about the Higashiyama walking route
How long is the Higashiyama walking route?
Roughly 2.5km from Kiyomizu-dera to Gion, taking 2-3 hours at a comfortable pace with stops, longer with detours to Kodai-ji or Maruyama Park.
Is the route accessible for strollers or wheelchairs?
Not really — the entire corridor from Kiyomizu-dera down to Gion is stepped and cobbled with no flat alternative. Bus connections at specific points are the practical workaround for mobility concerns.
What time should I start to avoid crowds?
Before 9am, ideally at Kiyomizu-dera’s opening, to get ahead of the mid-morning tour-group crowds on Ninenzaka and Sannenzaka. The alternative is walking the route in reverse starting in the late afternoon.
Can I do this route on my own, or do I need a guide?
It’s entirely walkable independently — this guide lays out the full route. A guide adds historical context, particularly for Gion’s geiko/maiko culture, that’s hard to pick up from signage alone.
What should I skip if I’m short on time?
The core route (Kiyomizu-dera, Sannenzaka, Ninenzaka, Yasaka Shrine, into Gion) is the essential version. Kodai-ji and Ishibe-koji are worthwhile add-ons if time allows, but skippable on a tight schedule.
Is this route worth doing if I’ve already seen Fushimi Inari?
Yes — they’re entirely different experiences. Fushimi Inari is a single hillside shrine with thousands of torii gates, best done as its own dedicated visit; Higashiyama is a continuous neighborhood walk through temples, shopping streets, and a living geisha district. Visitors doing both on the same trip generally find them complementary rather than repetitive, since one is a nature-and-shrine hike and the other is an urban historic-district walk.
Getting from Osaka to the start of the route
Most visitors staying in Osaka reach Kiyomizu-dera as a day trip: JR Special Rapid from Osaka Station to Kyoto Station runs 28-29 minutes, followed by a bus or taxi up to the temple (15-20 minutes), or the Keihan Main Line from Yodoyabashi or Kyobashi direct to Gion-Shijo Station (about 50 minutes) for those starting the route in reverse from the Gion end. Either approach works equally well; the choice mainly depends on which end of the route you’d rather tackle first in the cooler morning hours.
Doing the route as part of a full Kyoto day from Osaka
For visitors based in Osaka doing a single Kyoto day trip, Higashiyama pairs naturally with a morning start and an afternoon or evening return — arrive by mid-morning, walk the full route by early afternoon, and either continue into central Kyoto’s Nijo Castle and Nishiki Market or head back to Osaka in time for dinner. Trying to also fit Fushimi Inari or Arashiyama into the same single day alongside the full Higashiyama route is possible but genuinely rushed; most visitors get more out of picking one additional district rather than three, and treating a second Kyoto day trip as the realistic way to see the rest without turning either visit into a checklist exercise.
Luggage and same-day arrivals from the airport
Visitors arriving in Kansai the same day and heading straight to Higashiyama from Kansai International Airport should plan around luggage rather than attempting the stepped route carrying full bags — coin lockers near Kiyomizu-dera and the Higashiyama bus stop are a reasonable stopgap, but checking into Osaka or Kyoto accommodation first and returning empty-handed makes for a considerably more comfortable walk. See our Kansai Airport to Osaka guide for the transit logistics if this route is part of a same-day arrival itinerary, particularly if the flight lands in the afternoon and there’s a temptation to squeeze in a same-day Higashiyama visit despite jet lag and heavy bags.
A realistic half-day itinerary combining this route with lunch
For a single well-paced half-day, a realistic sequence is: Kiyomizu-dera opening to around 9:30am, the walk down through Sannenzaka and Ninenzaka to Yasaka Shrine by late morning, a late lunch stop in the Gion or Shijo-Karasuma area once the route flattens out, and either continuing into an afternoon in central Kyoto or heading back to Osaka. Building lunch in after the physically demanding stepped section rather than before it means less risk of an uncomfortable, food-heavy walk down the steeper stretches near the temple.
Top experiences
Bookable activities with verified prices and instant confirmation on GetYourGuide.